

Key Takeaways
- Attics and crawl spaces should be inspected at least once a year, ideally each spring and fall.
- Moisture is the primary threat - it enables mold, rot, and pest entry in both spaces.
- Proper ventilation and vapor barriers are the two most effective long-term defenses.
- Many problems in these spaces are visible to the naked eye during a careful walkthrough.
- Some repairs - especially those involving structural elements or electrical wiring - require a licensed professional.
What you will need
Why These Spaces Deserve Annual Attention
Attics and crawl spaces are the parts of a home most homeowners never think about - until something goes wrong. Yet these hidden areas directly influence energy efficiency, indoor air quality, and structural integrity. Moisture that accumulates in a crawl space doesn't stay there: it migrates upward through floors and walls, contributing to musty odors, elevated humidity indoors, and eventually wood rot in load-bearing framing. In the attic, inadequate ventilation or damaged insulation quietly drives up heating and cooling costs year-round.
The good news is that most problems in these spaces are detectable early - if you look. A once- or twice-yearly walkthrough using the steps below can catch the issues that deferred maintenance turns into major expenses. For a broader view of how these spaces fit into your home's overall upkeep, see our complete home maintenance overview.
Schedule Inspections After Severe Weather
Heavy rain, ice storms, and high winds can displace insulation, crack vents, and allow water intrusion almost overnight. Adding a brief attic and crawl space check to your post-storm routine catches problems before they compound. Even a five-minute visual scan with a flashlight can catch early trouble.
What You'll Need Before You Start
A successful inspection depends on having the right gear and a clear sense of what you're looking for. Review the tools below and the prerequisites before accessing either space. If your crawl space has very limited clearance (under 18 inches) or you have any physical limitations, consider hiring an inspector rather than attempting entry yourself.
Flashlight or headlamp
Provides hands-free illumination in dim attic and crawl space environments.
Moisture meter
Measures moisture content in wood framing and subflooring to detect hidden dampness.
Respirator (N95 or better)
Protects against insulation fibers, mold spores, and dust during inspection.
Vapor barrier sheeting (6-mil polyethylene)
Used to cover exposed soil in crawl spaces and block ground moisture from rising.
Duct tape or seam tape
Seals overlapping sections of vapor barrier sheeting at seams and edges.
Knee pads and work gloves
Protect your joints and hands during crawl space navigation.
What you will need
Step-by-Step Inspection and Upkeep Routine
Follow these steps in sequence for a thorough inspection of both spaces. Attic checks are generally easier to start with; crawl space work is more physically demanding and is best done on a dry day after a period of no rain.
Gather your tools and gear up safely
Before entering either space, assemble your flashlight or headlamp, moisture meter, N95 respirator, gloves, and knee pads. Wear long sleeves and pants - insulation fibers and rough framing surfaces can irritate exposed skin. Inform someone in the household that you're going in, and keep your phone accessible in case you need assistance.
Inspect attic insulation coverage and condition
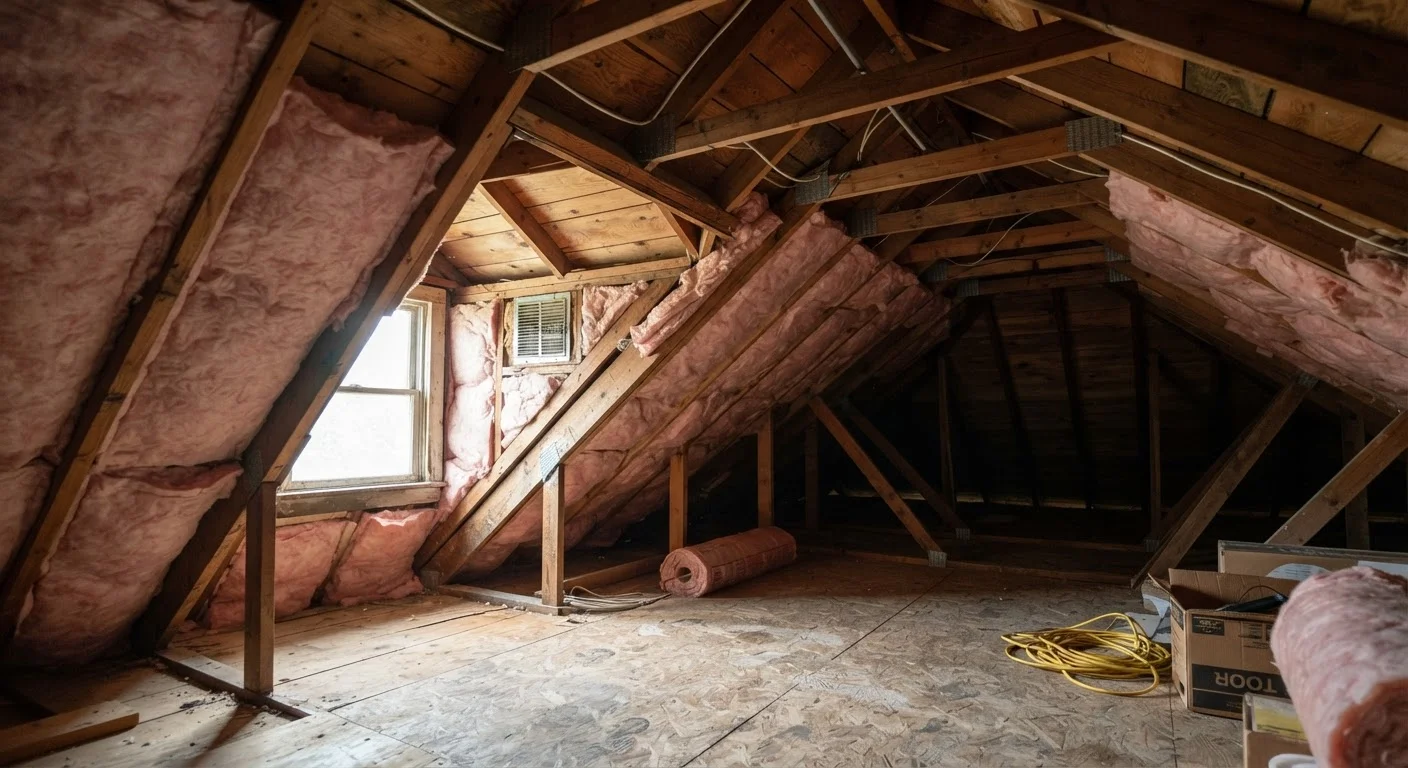
From the attic hatch, visually scan the insulation across the floor (the ceiling of the rooms below). Look for gaps, compressed areas, or spots where insulation has been displaced - these reduce thermal performance significantly. Check that insulation does not block soffit vents along the eaves, as that airflow is essential for controlling moisture and temperature. Use your moisture meter to spot-test wood framing; readings above 19% moisture content in wood generally warrant further investigation.
Check attic ventilation and look for moisture damage
Locate your ridge vents, soffit vents, or gable vents and confirm they are unobstructed. Blocked ventilation traps humid air, which leads to condensation on rafters - a common precursor to mold and wood rot. Look for dark staining or soft spots on roof sheathing and rafters; these are signs that moisture has been collecting. Also check around any roof penetrations (plumbing stacks, exhaust fans) for daylight gaps or staining, which can indicate where water is entering.
Examine the crawl space for moisture and vapor barrier integrity
Enter the crawl space carefully and begin by scanning for standing water, wet soil, or condensation on pipes and framing. A vapor barrier - typically 6-mil polyethylene sheeting - should cover all exposed soil, with seams overlapping by at least 12 inches and edges running up the foundation walls. Punctured, folded back, or missing sections of vapor barrier allow ground moisture to evaporate upward into the structural framing, creating ideal conditions for mold and wood decay.
Look for pest evidence in both spaces
Check for rodent droppings, chewed insulation, nesting materials, or insect galleries (small tunnels or hollow-sounding wood that may indicate termite activity). Both attics and crawl spaces provide the shelter and warmth that pests seek. Pay particular attention to where utility lines enter the building - gaps around pipes and wires are common entry points. Seal small openings with steel wool or appropriate caulk; larger gaps may require a pest control professional.
Document findings and prioritize next steps
Take photos of anything that looks damaged, wet, or out of place. Create a short written list organized by urgency: safety issues (active water intrusion, exposed wiring, mold) first, then maintenance gaps (compressed insulation, partial vapor barrier), then monitoring items (areas to recheck next season). Share this with any contractor you consult so they can assess conditions accurately. Keeping a record over several inspection cycles also helps you detect slow-developing problems before they become serious.
Know When to Call a Professional
If you discover active mold colonies, significant structural damage, or evidence of electrical issues in your attic or crawl space, stop and contact a licensed contractor or certified remediation specialist. DIY attempts to address these hazards can worsen damage, create safety risks, and may void your homeowner's insurance coverage. Always verify local permit requirements before undertaking any structural or major insulation work.
Common Problems and What They Signal
Certain findings during your inspection point to specific underlying issues worth understanding:
- Dark staining on rafters or sheathing: Usually indicates condensation from poor ventilation or a past leak. Check whether the staining is dry or actively growing - a musty smell or fuzzy texture suggests mold that may need professional remediation.
- Sagging or uneven insulation: Often caused by pest activity, water damage, or age. Displaced insulation means your thermal envelope has gaps, which your energy bills will reflect. See our insulation placement guide for context on repair options.
- Efflorescence on foundation walls: The white, chalky mineral deposits that appear on concrete or block walls are a sign that water is moving through the foundation. While not an emergency on its own, it warrants monitoring and possibly a drainage or waterproofing assessment.
- Soft or springy subfloor above the crawl space: This tactile warning sign, noticed when walking across floors above, can indicate wood decay from prolonged moisture exposure - a structural concern that merits professional evaluation.
Learning to read your home's early warning signs across all its systems is one of the highest-value skills a homeowner can develop.
Crawl Spaces Can Harbor Serious Hazards
Before entering a crawl space, check for standing water, exposed wiring, or signs of animal infestation. Poor air quality, radon gas, and confined-space conditions can all present real risks. Never enter a crawl space alone, and use appropriate respiratory protection when working around insulation or suspected mold.