

Key Takeaways
- Demolition always comes first - you cannot plan hidden work until walls are open.
- Rough-in plumbing and electrical must be completed and inspected before any walls close up.
- Waterproofing and cement board installation must precede all tile work.
- Fixtures and finish work are always the final phase, not an intermediate step.
- Skipping or reversing steps typically means tearing out finished work at significant cost.
- Permits and inspections are legally required in most jurisdictions - plan for them in your schedule.
What you will need
Why Sequence Is the Foundation of a Successful Bathroom Remodel
A bathroom renovation touches nearly every building trade - plumbing, electrical, tile, carpentry, and painting - often within the same small space. The order in which those trades work is not arbitrary. Each phase depends on the one before it, and reversing that order creates rework, cost overruns, and schedule delays that are entirely avoidable.
The most common and costly sequencing mistake homeowners make is treating the work as a series of independent tasks rather than a chain of dependent steps. Tiling before plumbing rough-in is inspected, or installing a vanity before the floor tile is set, forces you to undo finished work. Understanding the correct sequence lets you schedule trades efficiently, catch problems early, and keep the project moving without expensive backtracking.
For a broader view of how to coordinate multiple trades on a larger project, see our guide on who does what in a renovation. If you're weighing which parts of this work to tackle yourself, our DIY-or-pro framework can help you assess each phase honestly.
What you will need
What You'll Need Before Work Begins
A well-sequenced bathroom remodel depends on decisions being made before demolition starts, not during it. Finalize your fixture selections, tile choices, and layout before any work begins - changes mid-project are a leading driver of cost overruns. The rough-in dimensions for your toilet, shower valve, and tub need to be confirmed with your plumber from your actual fixture specs, not estimates.
Pry bar and demo tools
Used to remove existing tile, drywall, vanities, and fixtures during the demolition phase.
Cement board (backer board)
Installed over wall framing in wet areas to provide a stable, moisture-resistant surface for tile.
Waterproofing membrane
Applied over cement board in shower and tub surrounds to prevent water intrusion behind tile.
Tile wet saw
Cuts ceramic, porcelain, or stone tile accurately for walls and floors.
Level and layout tools
Ensures tile courses, fixtures, and cabinetry are plumb and level before permanent installation.
Drain and supply rough-in components
The pipes, valves, and fittings installed by a plumber before walls are closed.
Coordinate Your Trades in Advance
Licensed plumbers and electricians often have booking lead times of one to three weeks or longer. Schedule each trade before the previous phase wraps up so you don't lose days waiting. A simple written schedule shared with all contractors keeps everyone aligned.
Budget realistically and build in contingency. Older homes in particular often reveal surprises - galvanized pipes, knob-and-tube wiring, or water-damaged framing - once walls open up. For guidance on stretching a limited renovation budget without compromising quality, see getting the most from a small renovation budget.
The Correct Order of Work: Step by Step
Follow these steps in order. Skipping ahead - even when a later step seems ready to go - risks undoing finished work.
Permits Are Not Optional
Most bathroom remodels involving plumbing, electrical, or structural changes require permits and inspections from your local building department. Skipping this step can create problems when you sell your home or make an insurance claim. Always confirm permit requirements with your municipality before any work begins.
Complete Demolition and Assess the Substructure
Strip out everything that is being replaced: existing tile, drywall or greenboard, vanity, toilet, tub or shower unit, and any flooring. Demolition reveals the actual condition of the subfloor, wall framing, and existing plumbing and electrical runs - information you simply cannot have from a visual inspection alone.
Look for soft spots in the subfloor, signs of water damage in the framing, and the locations of existing supply and drain lines. What you find during demo directly shapes the scope and cost of everything that follows.
Handle Structural and Subfloor Repairs
If demolition revealed damaged joists, rot, or a compromised subfloor, now is the time to address it - before any trade work begins. Adding a layer of plywood to stiffen the floor or sistering a damaged joist is far simpler when the space is empty than after plumbing or tile is in place.
Any structural repairs that involve load-bearing walls or floor framing may require their own permit or engineer sign-off. Confirm with your building department before proceeding.
Rough-In Plumbing
A licensed plumber installs or relocates supply lines and drain rough-ins to match your new fixture layout. This includes the drain for the shower or tub, toilet flange, and supply stub-outs for the vanity, shower valve, and any other fixtures.
Rough-in dimensions - the distance from the wall to the center of a drain or supply line - are fixture-specific. Have your fixture specs on hand before the plumber begins so the rough-in lands in exactly the right location. Moving a rough-in after tile is installed is an expensive correction.
Rough-In Electrical
With plumbing rough-in complete, an electrician runs wiring for GFCI outlets, lighting, exhaust fans, and any radiant floor heating. Bathroom electrical work is code-regulated and requires a licensed electrician in most jurisdictions.
All new bathroom outlets must be GFCI-protected (Ground Fault Circuit Interrupter). The exhaust fan should be ducted directly to the exterior - not into an attic or soffit - to prevent moisture buildup.
Schedule and Pass Rough-In Inspections
Before any wall surfaces are closed, your municipality's inspector must approve the rough-in plumbing and electrical work. Do not skip this step - it is a legal requirement in most jurisdictions, and discovering a failed inspection after walls are tiled means opening them back up.
Contact your building department as soon as rough-in work is complete. Inspection scheduling timelines vary; in some areas you may wait several days. Build this into your project calendar.
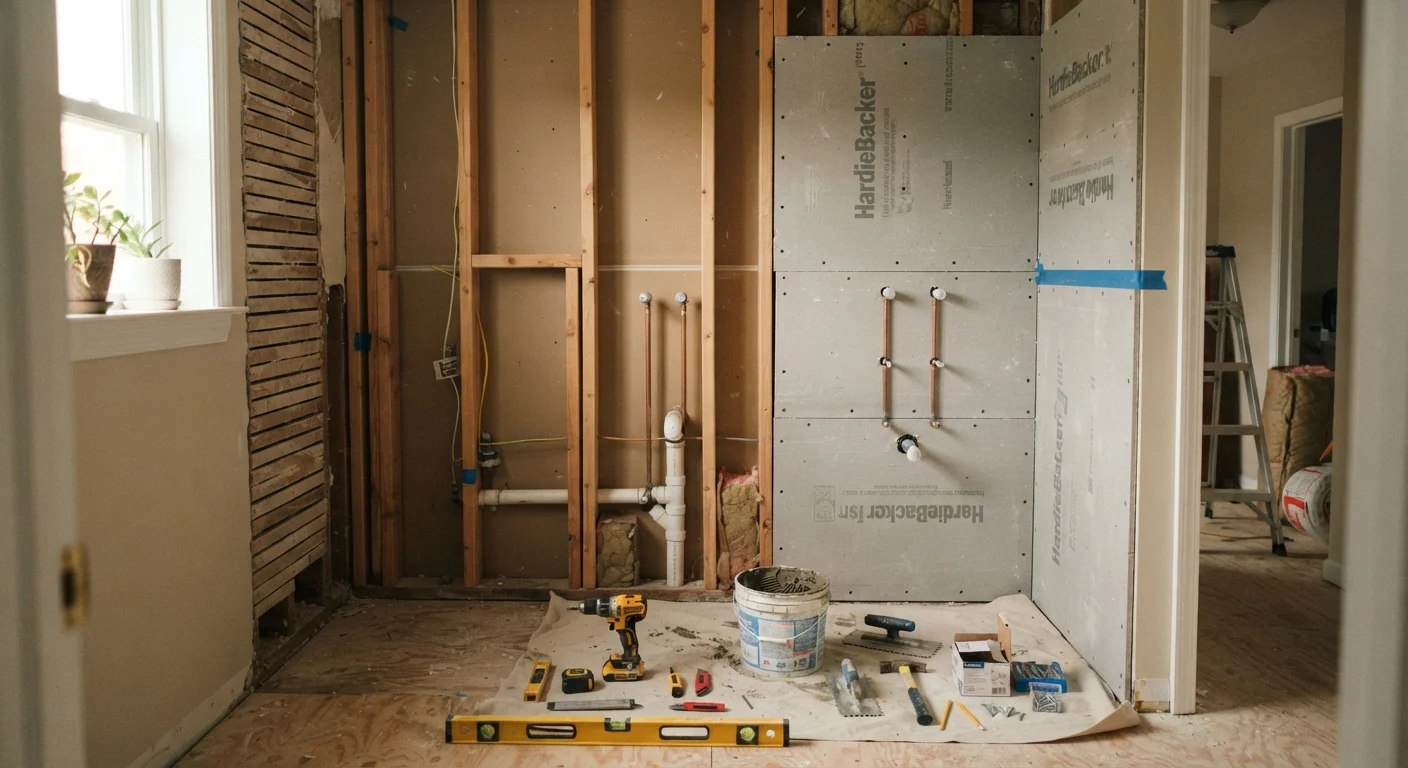
Install Cement Board and Waterproofing
Once inspections are passed, close the walls with the appropriate substrate. In wet areas - the shower surround, tub deck, and any area within splash range - use cement board rather than standard drywall. Cement board (such as fiber-cement or glass-mat gypsum backer) resists moisture damage that would cause regular drywall to fail.
Apply a waterproofing membrane over the cement board in all shower and tub enclosures before tiling. This layer is what actually prevents water from reaching your framing. It is not optional in a code-compliant bathroom. Dry areas like the vanity wall can use moisture-resistant drywall.
Tile the Shower or Tub Surround and Floors
With substrate and waterproofing in place, tile installation can begin. Work walls before floors, starting with the most visible focal wall and working outward. For floors, find the center of the room and lay out your tile pattern before cutting any pieces.
Allow tile and grout to cure fully - typically 24 to 72 hours depending on product instructions - before exposing surfaces to water. Grout lines in wet areas should be sealed after curing.
Install Vanity, Toilet, and Plumbing Fixtures
With tile fully set and grouted, bring in the finish fixtures. Install the vanity cabinet and countertop first, then connect supply lines and the drain. Set the toilet, connecting it to the flange and supply line. Install the shower valve trim, showerhead, and tub spout.
This is also the phase for mirrors, towel bars, toilet paper holders, and any other accessory hardware. Installing these before tile is finished risks damage to the tile surface and makes it harder to get hardware plumb and level against finished surfaces.
Complete Electrical Finish Work and Final Inspection
The electrician returns to install outlet covers, light fixtures, exhaust fan grilles, and any dimmer switches. GFCI outlets are tested and confirmed functional. If your project required permits, a final inspection by the building department closes out the permit and confirms the work is code-compliant.
A completed permit record is a tangible asset when you sell your home - it demonstrates the work was done properly and legally.
Never Close Walls Before Inspection
Installing drywall or cement board before your rough-in plumbing and electrical have passed inspection is a serious mistake. An inspector who cannot see the work may require you to open the walls again, costing both time and money. Schedule your rough-in inspection the moment work is complete.
Common Sequencing Mistakes and How to Avoid Them
Even experienced DIYers sometimes let enthusiasm outpace planning. A few patterns appear repeatedly in bathroom projects that run into trouble:
- Ordering fixtures too late: Long lead times on specialty tile, custom vanities, or plumbing fixtures can stall an entire project at a critical phase. Order materials as soon as your design is locked in.
- Skipping the waterproofing membrane: Cement board alone does not make a shower watertight. The membrane is the barrier. Skipping it typically leads to water intrusion, mold, and tile failure within a few years.
- Installing flooring before all ceiling and wall work is done: Finishing floors before painting or hanging light fixtures risks damage to the finished surface. Paint walls and ceilings first, then address floors.
- Overlooking ventilation: An exhaust fan must be ducted to the exterior. A fan that recirculates air into the attic adds moisture where it causes rot and mold. Confirm the duct path before the ceiling closes.
Bathroom remodels share many of the same planning pitfalls as larger kitchen projects. The kitchen renovation reality check covers assumptions that repeatedly drive projects over budget - most of them apply here too.